Beginning to focus back on the audio experience game I was creating, I want to look at the specific sounds used across the experience. At the moment, many of the sounds serve as placeholders, cut from games and other experiences. I want to look into what kind of sound create neutral ambience in order to create a game dictated by how it plays, rather than how it sounds for the initial testing.
Above is a video sound experience which does something much the opposite, focusing on tone to envisage a scene without visual. However listening to experiences like this will enable me to find what spaces work best spatially.
After I have found more appropriate sounds, I want to begin testing how menus and interfaces will work best in a non visual experience. Tactile interfaces may be the most appropriate option, but I want to avoid bespoke interfacing options for now so that testing for the game can remain as accessible as possible with devices people will already own.
First thinking about the visual element, and how to keep it as simple as possible. I wanted to have some form of indicator that you are interacting and that key presses are being made, while also creating some sort of visual identity to go along with the game.

Using the keys themselves as a graphic works really well. They are the only tactile part of the game currently so therefore their presence isn’t entirely about the visual. The keys will turn green when pressed to help the user confirm they are interacting correctly, and a small 6 key keyboard will be acquired to be the game interface for now. For the moment, if keys are numbered 1-6 with 1,2,3 being the top row and 4,5,6 being the second row, keys 2,4,5,6 will be used to control the movement of the character. key 1 will be used to activate a voice indicator of the current level and play time, and key 3 will be held for 5 seconds to restart the game with audio indicators for the 5 seconds pressed. These will be explained during the tutorial segment.
After playing through the game, the spoken voice queues given to the player also need to be revised alongside the specific sounds. These are going to be changed as follows for various actions:
Hello and welcome to here, an audio only game, any visuals are only to indicate the game is running. Use the R, D, F and G keys to move in the game. The T key will tell you the level and current play time, and the E key will reset the playthrough. Your aim is to navigate through a series of maze levels using spatial sound, headphones are required. Two sounds will be played for you now, please listen carefully…. This sound indicates that you are near a wall…. This sound indicates the end of the level which you are aiming for, try to move to this one now.
This sound indicates that you have found the end of the level, level 1 is about to begin, hold T to skip the tutorial next time, and good luck.
This next level will contain obstacles, you must avoid them, they are indicated by this sound… If you touch them the level will restart and you will hear this sound… The game is about to continue.
Hello, you haven’t moved in a while, press F to restart the game and hear the tutorial.
WARNING GAME RESET KEY PRESSED, GAME WILL RESET IN 5, 4, 3, 2, 1 GAME RESET.
Current Level: (TXT TO SPEECH), Play Time: (TXT TO SPEECH).
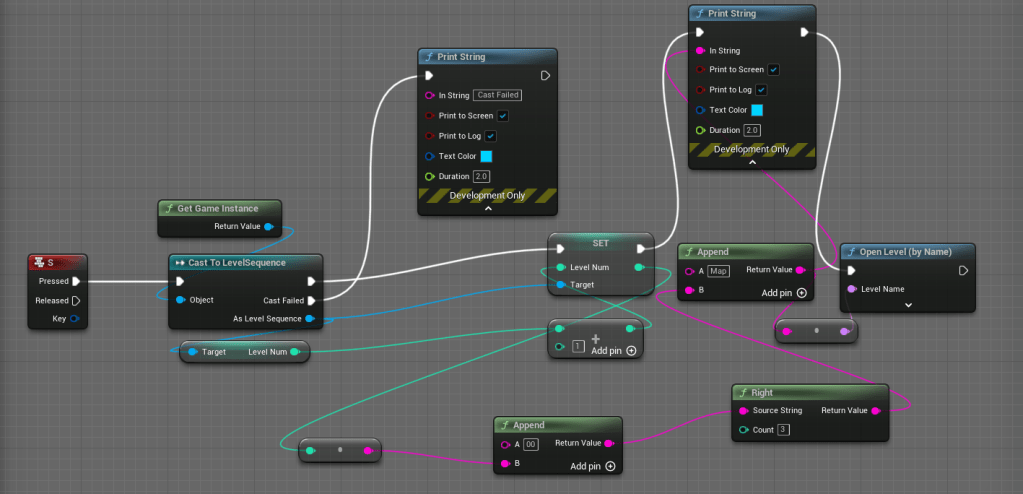
The following nodes within the game enable the overlay which I explained above to work. They display a black screen with 6 greyed out keys on top. This not only allows the player to see which keys are being pressed, and provides a visual feedback for the user, just enough to ensure them the game is running, but also the W toggle enables the game to be viewed or hidden. This is useful for myself when I want to test the game is working properly.


The next series of nodes were all created to add button functions, either for the debugging and developer process, or for the game itself.